As some of you know already, I recently switched from continuing to write tbis blog to sharing a newsletter on Substack (see here). I have been on WordPress for over a decade but recently fell out of love with the platform – editing posts became increasingly cumbersome and I also felt a bit lost in the myriad of plug-ins you could (should?) install on your page. By contrast, the simplicity of the Substack interface feels positively soothing and opening the Substack app to catch up on unread newsletters from folks I have admired for a long time (be it David Lebovitz, Sarah Lemanski, Nicola Lamb etc) reminds me of the good old Google Reader. In short, moving to Substack felt like the right move both for my readers and for myself. The Real Simple Food newsletter on Substack is very much a continuation of this blog – so you can expect to see more recipes of mine as well as

Preserved Lemon Drizzle Loaf
Corona notwithstanding, the last few weeks I found myself on multiple worktrips. After 2 years of working from home, it

Whipped cream … but not only …
Let’s talk about whipped creme fraiche, labneh whipped cream, whipped coconut cream and anything else that can be whipped into

Butterkuchen – Germany’s (sweet) answer to Focaccia?
I have these random food epiphanies sometimes. Like what is hummus if not a sort of vegan mayonnaise (where the
read more Butterkuchen – Germany’s (sweet) answer to Focaccia?
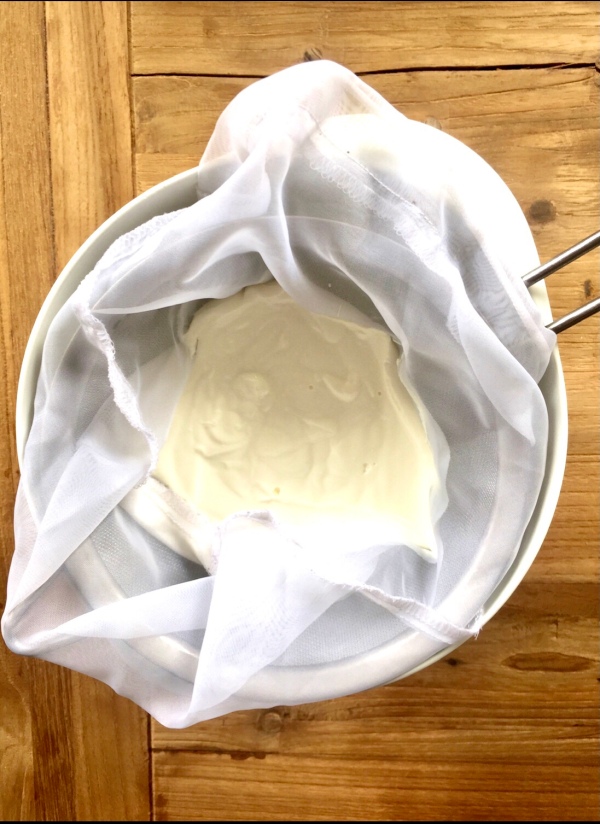
Labneh – the best possible thing you can make with a pot of yoghurt?
If you ask me, Labneh must be the best possible thing you can make with a pot of yoghurt. A
read more Labneh – the best possible thing you can make with a pot of yoghurt?

Custard: the mother sauce of dessert? Plus how to make a simple creme anglaise
Unsurprisingly, over the course of the past year, my boyfriend and I have been watching a lot of Netflix, HBO,
read more Custard: the mother sauce of dessert? Plus how to make a simple creme anglaise

Sugar-dusted
I am all about making baked goods and desserts taste that little bit more interesting, be it by playing around
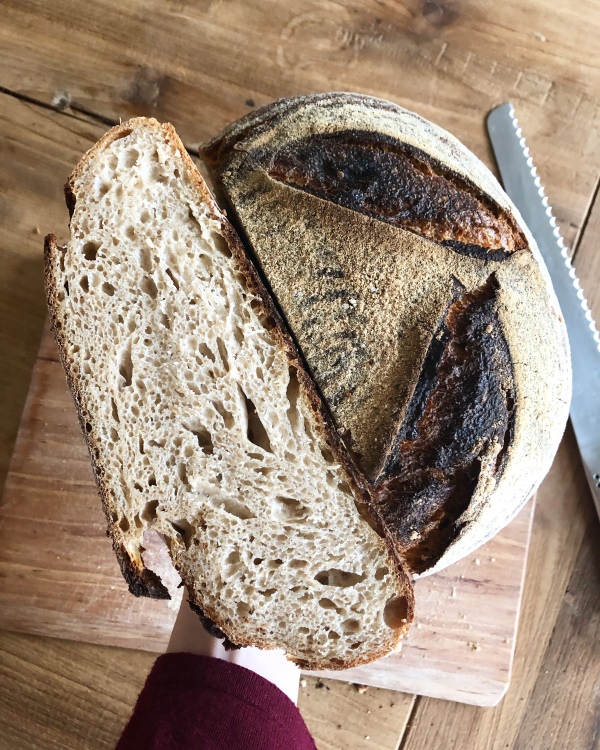
Baking your own sourdough bread – tips and tricks and common mistakes to avoid – Part 2
I know I am not the only one who has been using the various lockdowns over the past year to
read more Baking your own sourdough bread – tips and tricks and common mistakes to avoid – Part 2

Pan de Muerto and Café de Olla – just in time for Día de los Muertos / Allsaints
Sitting in a cafe with a cup of coffee while reading a book or working on a blog post, maybe
read more Pan de Muerto and Café de Olla – just in time for Día de los Muertos / Allsaints

Plum Tarte Tatin with Chinese Five Spice Powder and Tonka Bean Creme Anglaise
I tested and photographed this Tarte Tatin a week ago when it looked like autumn was clearly on its way
read more Plum Tarte Tatin with Chinese Five Spice Powder and Tonka Bean Creme Anglaise
